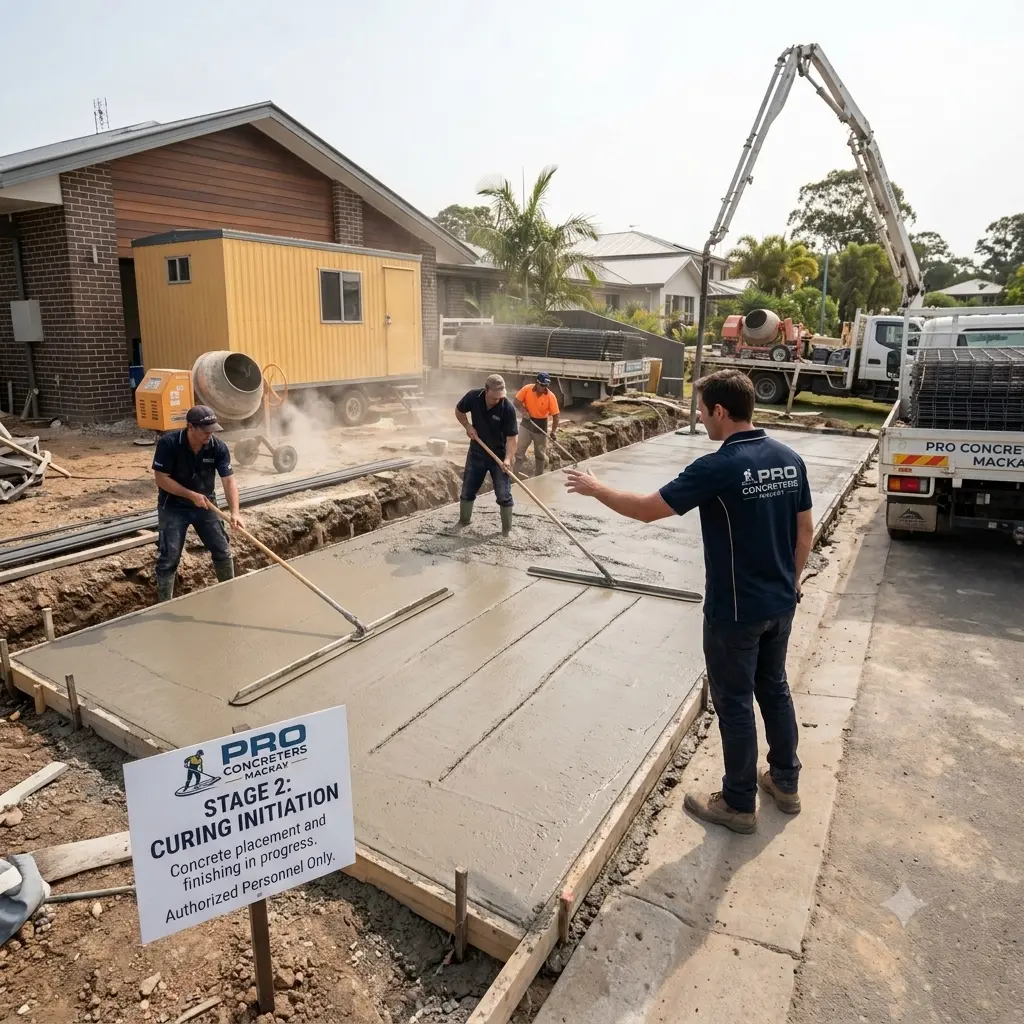
If you’ve just had a new concrete driveway installed, you’re probably eager to start using it and enjoying its smooth, durable surface. However, before you can drive or park on your new driveway, it’s important to allow sufficient time for the concrete to cure and harden properly. Curing is the process by which concrete develops its strength, durability, and resistance to wear and tear, and it’s a critical step in ensuring the long-term performance and longevity of your driveway.
In this article, we’ll explain the basics of the concrete curing process, including the typical timeline and milestones for a newly poured driveway. We’ll also discuss some of the key factors that can affect the curing time, as well as some best practices and precautions for protecting and maintaining your driveway during and after the curing period.
Curing Process Overview
Concrete curing is a complex and dynamic process that involves several physical and chemical changes in the concrete mix over time. At a basic level, curing refers to the hardening and strengthening of concrete through the hydration of the cement particles with water. As the cement hydrates, it forms a network of crystals and gels that bind the aggregates and other ingredients together, creating a solid and durable mass.
However, the curing process is not instantaneous or uniform, and it can vary widely depending on the specific mix design, environmental conditions, and curing methods used. In general, the curing process can be divided into several stages, each with its own characteristics and requirements:
Initial Set Time
The initial set time is the period immediately after the concrete is placed and finished, during which the concrete begins to stiffen and lose its plasticity. During this stage, the concrete is still relatively soft and workable, but it can no longer be easily molded or shaped. The initial set time can range from a few minutes to a few hours, depending on the specific mix design and environmental conditions.
During the initial set time, it’s important to protect the concrete from any disturbance or damage, such as foot traffic, rain, or freezing temperatures. Any disruption to the surface or structure of the concrete during this stage can cause permanent defects or weakness in the finished driveway.
Early Strength Development
After the initial set time, the concrete enters a period of early strength development, during which it rapidly gains strength and hardness. This stage typically lasts for the first 24 to 48 hours after placement, and it’s critical for establishing the foundation for the long-term performance of the driveway.
During early strength development, the concrete continues to hydrate and form new crystals and gels, which fill in the pores and voids in the mix and create a dense and cohesive structure. The rate and extent of strength development can vary widely depending on the specific mix design, curing conditions, and quality control measures used.
To optimize early strength development, it’s important to maintain proper moisture and temperature levels in the concrete, and to protect it from any external stresses or loads. This may involve using curing compounds, covers, or other methods to retain moisture and regulate temperature, as well as limiting traffic and weight on the surface.
Full Cure Timeline
After the early strength development stage, the concrete continues to cure and gain strength over a longer period of time, typically several weeks to several months. The full cure timeline can vary widely depending on the specific mix design, environmental conditions, and intended use of the driveway, but it generally follows a logarithmic curve, with the rate of strength gain gradually slowing over time.
For a typical residential concrete driveway, the full cure timeline may look something like this:
- 24 to 48 hours: The concrete reaches about 70% of its ultimate strength, and can support light foot traffic and non-structural loads.
- 7 days: The concrete reaches about 85% of its ultimate strength, and can support moderate vehicle traffic and normal usage.
- 28 days: The concrete reaches about 95% of its ultimate strength, and is considered fully cured for most purposes.
- 90 days and beyond: The concrete continues to gain strength and durability over time, and may reach its maximum potential after several months or even years of curing.
However, it’s important to note that these timelines are only rough estimates, and the actual curing time for your driveway may be longer or shorter depending on various factors, which we’ll discuss in more detail below.
Usage Milestones
While the full cure timeline for a concrete driveway can span several months or more, there are several key usage milestones that you can use as a guide for when and how to start using your new driveway. These milestones are based on the strength and durability of the concrete at different stages of the curing process, as well as the specific loads and stresses that the driveway will be subject to.
Here are some general usage milestones for a newly poured concrete driveway:
- 24 to 48 hours after placement: You can walk on the driveway gently, but avoid any heavy or concentrated loads, such as furniture or equipment. Keep pets, children, and vehicles off the surface.
- 3 to 7 days after placement: You can drive light vehicles, such as cars and SUVs, on the driveway, but avoid any heavy trucks, trailers, or construction equipment. Park in different spots to distribute the weight evenly.
- 7 to 28 days after placement: You can use the driveway normally for most residential purposes, but avoid any excessive or prolonged loads, such as parking a heavy vehicle in the same spot for extended periods.
- 28 days and beyond: The driveway is fully cured and can support most normal loads and usage, but may still be susceptible to damage from heavy or sharp objects, oil or chemical spills, or extreme temperatures.
Of course, these usage milestones are only general guidelines, and the actual timing and precautions may vary depending on your specific driveway and situation. It’s always best to consult with your concrete contractor or a professional engineer to determine the appropriate usage and maintenance schedule for your new driveway.
Environmental Factors
One of the key factors that can affect the curing time and process for a concrete driveway is the environment in which it is poured and cured. The temperature, humidity, wind, and precipitation can all have significant impacts on the hydration, strength development, and durability of the concrete, and can require special precautions or adjustments to ensure optimal results.
Here are some of the main environmental factors to consider when pouring and curing a concrete driveway:
Temperature Impact
The temperature of the air, ground, and concrete mix can have a major impact on the curing time and process for a driveway. In general, warmer temperatures will accelerate the hydration and strength development of the concrete, while cooler temperatures will slow it down. However, excessively high or low temperatures can also cause problems, such as:
- Hot weather (above 90°F or 32°C): High temperatures can cause the concrete to set and harden too quickly, leading to reduced strength, increased cracking, and poor surface quality. Hot weather can also increase the risk of moisture loss and shrinkage, which can further weaken the concrete.
- Cold weather (below 50°F or 10°C): Low temperatures can slow down or even stop the hydration and strength development of the concrete, leading to delayed setting, reduced strength, and increased risk of freezing damage. Cold weather can also increase the risk of moisture accumulation and ice formation, which can cause scaling, spalling, and other surface defects.
To mitigate the temperature impact on concrete curing, it’s important to use appropriate mix designs, placement techniques, and curing methods for the specific weather conditions. This may involve using hot water, accelerators, or insulation for cold weather, or using ice, retarders, or evaporative cooling for hot weather. It may also involve monitoring and adjusting the curing process based on the actual temperature and moisture levels in the concrete.
Humidity Effects
The humidity of the air and ground can also have a significant impact on the curing time and process for a concrete driveway. In general, higher humidity will slow down the evaporation and moisture loss from the concrete, while lower humidity will accelerate it. However, excessively high or low humidity can also cause problems, such as:
- High humidity (above 80%): High humidity can reduce the rate of hydration and strength development in the concrete, leading to delayed setting, reduced strength, and increased risk of surface defects. High humidity can also increase the risk of moisture accumulation and condensation, which can cause scaling, staining, and other surface problems.
- Low humidity (below 40%): Low humidity can increase the rate of evaporation and moisture loss from the concrete, leading to reduced strength, increased cracking, and poor surface quality. Low humidity can also increase the risk of plastic shrinkage and crazing, which can cause a network of fine cracks on the surface of the concrete.
To mitigate the humidity impact on concrete curing, it’s important to use appropriate curing methods and materials for the specific humidity conditions. This may involve using water sprays, fog sprays, or wet burlap for high humidity, or using curing compounds, covers, or barriers for low humidity. It may also involve monitoring and adjusting the curing process based on the actual humidity and moisture levels in the concrete and surrounding environment.
Wind Effects
The wind speed and direction can also have an impact on the curing time and process for a concrete driveway, especially in combination with other environmental factors. In general, higher wind speeds will increase the rate of evaporation and moisture loss from the concrete, while lower wind speeds will reduce it. However, wind can also cause uneven drying and cooling of the concrete surface, leading to cracking, curling, and other defects.
To mitigate the wind impact on concrete curing, it’s important to use appropriate windbreaks, barriers, or covers to protect the concrete surface from direct wind exposure, especially during the initial set and early strength development stages. It may also involve using water sprays, fog sprays, or curing compounds to maintain a consistent moisture level and temperature in the concrete, and to prevent rapid drying or cooling of the surface.
Rain Protection
Finally, precipitation, such as rain, snow, or hail, can have a major impact on the curing time and process for a concrete driveway, especially if it occurs during the initial set or early strength development stages. Rain can dilute the surface of the concrete, wash away the cement paste, and create a weak, porous layer that is susceptible to scaling, spalling, and other defects. Snow and hail can also cause physical damage to the surface of the concrete, as well as thermal shock and freeze-thaw cycles that can further weaken the structure.
To mitigate the rain impact on concrete curing, it’s important to use appropriate covers, shelters, or tents to protect the concrete surface from direct exposure to precipitation, especially during the first 24 to 48 hours after placement. It may also involve using sealers, hardeners, or other surface treatments to improve the resistance and durability of the concrete surface, and to prevent moisture infiltration and damage.
Of course, the best way to avoid the impact of precipitation on concrete curing is to schedule the placement and finishing of the driveway during a period of dry, stable weather, with no forecast of rain or snow for at least 24 hours after completion. However, if unexpected precipitation does occur, it’s important to have contingency plans and materials in place to protect the concrete and ensure its long-term performance.
Curing Methods
In addition to the environmental factors that can affect the curing time and process for a concrete driveway, there are also several methods and materials that can be used to optimize and accelerate the curing process, and to ensure the best possible strength, durability, and appearance of the finished surface. These curing methods can be divided into four main categories, each with its own advantages, disadvantages, and applications:
Water Curing
Water curing is one of the oldest and most common methods for curing concrete, and involves maintaining a constant supply of moisture to the surface of the concrete to promote hydration and prevent moisture loss. Water curing can be done by several methods, such as:
- Ponding: Creating a temporary dam or berm around the perimeter of the concrete and filling it with water to a depth of 1 to 2 inches.
- Spraying: Using a hose, sprinkler, or fog nozzle to apply a fine mist of water to the surface of the concrete at regular intervals.
- Wet coverings: Placing wet burlap, cotton mats, or other absorbent materials on the surface of the concrete and keeping them continuously moist.
Water curing is most effective when started as soon as possible after the initial set of the concrete, and continued for at least 7 days or until the concrete reaches 70% of its design strength. Water curing can help to:
- Provide a continuous supply of moisture for hydration
- Reduce the risk of plastic shrinkage and cracking
- Improve the surface quality and durability of the concrete
- Reduce the risk of thermal stress and curling
However, water curing also has some limitations and challenges, such as:
- Requiring a large volume of clean, potable water
- Requiring frequent monitoring and replenishment of the water supply
- Causing potential damage or erosion to the surface of the concrete from excessive or uneven water application
- Attracting dirt, debris, and stains to the surface of the concrete
- Delaying the use and finishing of the concrete surface
Membrane Curing
Membrane curing is another common method for curing concrete, and involves applying a liquid chemical compound to the surface of the concrete to form a thin, continuous film that seals in moisture and prevents evaporation. Membrane curing compounds can be applied by spraying, brushing, or rolling, and can be clear, white, or pigmented depending on the desired appearance and reflectivity of the surface.
Membrane curing is most effective when applied as soon as possible after the final finishing of the concrete, and can provide protection for up to 30 days or more depending on the specific product and application. Membrane curing can help to:
- Provide a barrier to moisture loss and evaporation
- Reduce the risk of plastic shrinkage and cracking
- Allow for faster finishing and use of the concrete surface
- Provide a more consistent and uniform curing process
However, membrane curing also has some limitations and challenges, such as:
- Requiring proper surface preparation and cleaning before application
- Requiring proper mixing, application, and coverage rates for optimal performance
- Potentially affecting the appearance, color, and texture of the concrete surface
- Potentially interfering with the bond and adhesion of subsequent coatings, toppings, or overlays
- Requiring removal or degradation before further finishing or use of the surface
Chemical Curing
Chemical curing is a newer and more advanced method for curing concrete, and involves adding chemical admixtures to the concrete mix to accelerate or enhance the hydration and strength development process. Chemical curing admixtures can be divided into two main types:
- Accelerators: Chemicals that increase the rate of hydration and early strength gain in the concrete, such as calcium chloride, calcium nitrate, or triethanolamine.
- Water reducers: Chemicals that reduce the amount of water needed in the concrete mix while maintaining the same workability and strength, such as lignosulfonates, polycarboxylates, or naphthalene sulfonates.
Chemical curing is most effective when used in combination with other curing methods, such as water curing or membrane curing, and can provide several benefits, such as:
- Reducing the curing time and accelerating the strength development of the concrete
- Improving the durability, density, and impermeability of the concrete
- Reducing the risk of shrinkage, cracking, and curling
- Allowing for faster finishing, stripping, and use of the concrete surface
However, chemical curing also has some limitations and challenges, such as:
- Requiring proper dosage, mixing, and compatibility with other admixtures and materials in the concrete mix
- Potentially affecting the color, texture, and appearance of the concrete surface
- Potentially increasing the cost and complexity of the concrete mix and placement process
- Requiring proper safety and handling precautions for the chemical admixtures
Natural Curing
Natural curing is the simplest and most basic method for curing concrete, and involves allowing the concrete to cure and harden under ambient environmental conditions, without any additional water, membranes, or chemicals. Natural curing relies on the inherent moisture and temperature of the concrete mix and surrounding environment to promote hydration and strength development, and can be sufficient for some applications and conditions.
Natural curing is most effective when the ambient temperature and humidity are within the optimal range for concrete hydration (between 50°F and 90°F, and between 40% and 80% relative humidity), and when the concrete surface is protected from excessive wind, sun, or precipitation. Natural curing can help to:
- Minimize the cost and complexity of the curing process
- Allow for a more natural and gradual strength development of the concrete
- Reduce the risk of surface defects or damage from excessive or uneven curing
However, natural curing also has some limitations and challenges, such as:
- Providing little or no control over the moisture and temperature conditions of the concrete
- Requiring longer curing times and slower strength development than other methods
- Increasing the risk of shrinkage, cracking, and curling from excessive or rapid moisture loss
- Requiring protection from extreme weather conditions, such as freezing, overheating, or heavy rain
In general, natural curing is not recommended for most concrete driveway applications, especially in areas with hot, dry, or variable weather conditions. However, it may be suitable for small, non-critical projects, or for supplementing other curing methods in mild and stable environments.
Usage Guidelines
Once your new concrete driveway has been poured and cured, it’s important to follow some basic usage guidelines to ensure its long-term performance and durability, and to prevent any damage or deterioration from improper use or exposure. Here are some general tips and recommendations for using your concrete driveway during and after the curing process:
Foot Traffic Timing
As mentioned earlier, you can generally walk on your new concrete driveway after 24 to 48 hours of curing, but it’s important to do so gently and carefully, and to avoid any heavy or concentrated loads. Walking on the surface too soon or too aggressively can cause permanent indentations, cracks, or other defects in the concrete, especially if it hasn’t reached sufficient strength.
When walking on your new driveway, try to:
- Distribute your weight evenly and avoid stepping in the same spot repeatedly
- Wear soft-soled shoes or boots to minimize the impact and abrasion on the surface
- Avoid dragging or sliding heavy objects, such as furniture or equipment, across the surface
- Keep pets and children off the surface as much as possible, or supervise them closely
Vehicle Access
Depending on the specific mix design and curing conditions of your driveway, you may be able to drive light passenger vehicles on the surface after 3 to 7 days of curing, but it’s important to do so carefully and sparingly, and to avoid any heavy trucks, trailers, or construction equipment. Driving on the surface too soon or too heavily can cause cracking, spalling, or other structural damage to the concrete, especially if it hasn’t reached sufficient strength.
When driving on your new driveway, try to:
- Drive slowly and smoothly, and avoid sudden stops, starts, or turns
- Distribute the vehicle weight evenly and avoid parking in the same spot repeatedly
- Keep the tires properly inflated and balanced to minimize the impact and wear on the surface
- Avoid driving on the edges or corners of the driveway, which are more susceptible to damage
- Keep heavy vehicles, such as delivery trucks or moving vans, off the surface as much as possible, or use protective mats or boards to distribute the weight
Heavy Load Restrictions
Even after your concrete driveway has reached its full design strength (typically after 28 days or more of curing), it’s important to avoid subjecting it to excessive or prolonged heavy loads, such as parking a large truck or trailer in the same spot for extended periods, or using it as a storage or staging area for heavy equipment or materials. These types of loads can cause gradual or sudden failure of the concrete, especially if it hasn’t been designed or reinforced to handle them.
When using your driveway for heavy loads, try to:
- Distribute the weight evenly and avoid concentrating it in small areas or weak spots
- Use protective mats, boards, or tires to spread the load and minimize the direct contact with the surface
- Monitor the surface regularly for any signs of cracking, settling, or other damage, and repair them promptly
- Consult with a professional engineer or contractor if you plan to use your driveway for any unusual or extreme loads, such as a large RV, boat, or construction equipment
Weather Protection
Finally, it’s important to protect your concrete driveway from any extreme or adverse weather conditions, both during and after the curing process. Exposure to freezing temperatures, heavy rain, or intense sunlight can cause various types of damage or deterioration to the concrete, such as scaling, spalling, cracking, or discoloration.
To protect your driveway from weather damage, try to:
- Cover the surface with insulating blankets, straw, or other materials if freezing temperatures are expected, especially during the first few days of curing
- Use a waterproof sealer or coating to prevent moisture infiltration and freeze-thaw damage, especially in areas with frequent rain or snow
- Provide proper drainage and slope to prevent water from pooling or standing on the surface, which can cause erosion, staining, or other damage
- Use a reflective or pigmented curing compound to reduce the surface temperature and prevent excessive heat gain or thermal stress, especially in areas with intense sunlight
- Avoid using deicing salts or chemicals on the surface, which can cause scaling, spalling, or corrosion of the concrete and any embedded metal
- Monitor the surface regularly for any signs of weather-related damage or wear, and repair them promptly to prevent further deterioration
By following these usage guidelines and best practices, you can help ensure that your new concrete driveway stays strong, durable, and attractive for many years to come, and provides reliable and safe service for all your parking and access needs.
Monitoring Process
In addition to following proper usage guidelines, it’s also important to monitor and maintain your concrete driveway regularly to ensure its optimal performance and longevity, and to detect and address any potential issues or defects before they become more serious or costly to repair. Here are some key aspects of the monitoring process for a newly poured concrete driveway:
Moisture Retention
One of the most critical factors in the curing and strength development of concrete is the retention of moisture in the mix, especially during the early stages of hydration. If the concrete loses too much moisture too quickly, it can cause shrinkage, cracking, and reduced strength and durability. On the other hand, if the concrete retains too much moisture for too long, it can cause delayed setting, softening, and surface defects.
To monitor the moisture retention of your concrete driveway, you can use various methods, such as:
- Visual inspection: Look for any signs of dry or wet spots, discoloration, or surface texture changes that may indicate uneven or inadequate moisture distribution.
- Touch test: Gently press your finger or a piece of absorbent paper on the surface of the concrete to see if it feels dry, damp, or wet, and if it leaves a visible mark or imprint.
- Moisture meter: Use a portable moisture meter or sensor to measure the relative humidity or moisture content of the concrete at various depths and locations, and compare it to the optimal range for the specific mix and curing conditions.
If you detect any moisture issues or variations during the monitoring process, you can adjust the curing method or materials accordingly, such as increasing or decreasing the frequency or intensity of water curing, or applying a different type or amount of curing compound.
Temperature Control
Another important factor in the curing and strength development of concrete is the control of temperature, both internally and externally. If the concrete mix or environment is too hot or too cold, it can cause various problems, such as rapid setting, delayed setting, thermal stress, or freezing damage.
To monitor the temperature control of your concrete driveway, you can use various methods, such as:
- Thermometer: Use a handheld or embedded thermometer to measure the temperature of the concrete mix, the air, and the ground at various stages of the curing process, and compare it to the optimal range for the specific mix and curing conditions.
- Infrared camera: Use a thermal imaging camera or sensor to detect any hot or cold spots, gradients, or anomalies on the surface or within the concrete, and identify any potential sources of heat gain or loss.
- Maturity meter: Use a maturity meter or sensor to estimate the strength development of the concrete based on the time-temperature history of the mix, and predict the optimal time for finishing, stripping, or loading the surface.
If you detect any temperature issues or variations during the monitoring process, you can adjust the curing method or materials accordingly, such as using insulating blankets, heating cables, or cooling sprays to maintain the optimal temperature range, or modifying the mix design or placement schedule to avoid extreme weather conditions.
Surface Protection
In addition to moisture and temperature control, it’s also important to protect the surface of the concrete from any physical damage, contamination, or wear during the curing process and beyond. The surface of the concrete is the most vulnerable and visible part of the driveway, and any defects or irregularities can affect its appearance, durability, and performance.
To monitor the surface protection of your concrete driveway, you can use various methods, such as:
- Visual inspection: Look for any signs of cracks, chips, stains, or other surface defects that may indicate improper finishing, curing, or usage of the concrete.
- Depth gauge: Use a depth gauge or straightedge to measure the surface profile, flatness, and levelness of the concrete, and compare it to the specified tolerances and standards for the project.
- Durability tests: Use various durability tests, such as abrasion, impact, or freeze-thaw resistance, to evaluate the surface hardness, toughness, and resilience of the concrete, and identify any potential weaknesses or failures.
If you detect any surface issues or defects during the monitoring process, you can take corrective actions accordingly, such as applying a surface sealer, hardener, or coating to improve the protection and performance of the concrete, or repairing any cracks, spalls, or other damage with appropriate patching or resurfacing materials and techniques.
Strength Testing
Finally, to ensure that your concrete driveway has achieved the required strength and quality for its intended use and service life, it’s important to conduct various strength tests at different stages of the curing process and beyond. Strength testing can provide valuable information about the actual performance and compliance of the concrete mix, and can help identify any potential issues or deficiencies that may affect its long-term durability and safety.
There are several types of strength tests that can be used for concrete driveways, such as:
- Compression test: This test measures the compressive strength of the concrete by applying a load to a cylindrical or cubic sample until it fails, and comparing the result to the specified design strength. Compression tests are typically conducted at 7, 14, and 28 days after placement, and can provide a good indication of the overall quality and consistency of the concrete mix.
- Flexural test: This test measures the flexural strength or modulus of rupture of the concrete by applying a bending load to a beam or prism sample until it breaks, and comparing the result to the specified design strength. Flexural tests are typically conducted at 28 days after placement, and can provide a good indication of the load-carrying capacity and crack resistance of the concrete driveway.
- Pull-off test: This test measures the surface tensile strength and adhesion of the concrete by applying a pulling force to a metal disk or dolly attached to the surface until it detaches, and comparing the result to the specified bond strength. Pull-off tests are typically conducted at various ages and locations of the driveway, and can provide a good indication of the surface integrity and compatibility with any coatings, overlays, or repairs.
If the strength test results do not meet the specified requirements or expectations, it may be necessary to investigate the cause of the deficiency, such as improper mix design, placement, curing, or testing procedures, and take corrective actions accordingly, such as modifying the mix proportions, extending the curing time, or applying a structural reinforcement or overlay to the surface.
By monitoring and testing your concrete driveway regularly and thoroughly, you can ensure that it meets the highest standards of quality, performance, and durability, and provides a safe, functional, and attractive surface for your parking and access needs for many years to come.

Frequently Asked Questions
To help you better understand the curing process and timeline for a newly poured concrete driveway, here are some answers to common questions and concerns:
How soon can I walk on my new concrete driveway?
In most cases, you can walk on your new concrete driveway 24 to 48 hours after placement, but it’s important to do so gently and carefully, and to avoid any heavy or concentrated loads that may cause indentations, cracks, or other damage to the surface. If possible, try to keep foot traffic to a minimum during the first week of curing, and use caution tape, cones, or signs to alert others to the fresh concrete.
How long should I wait before driving on my new concrete driveway?
The wait time for driving on a new concrete driveway can vary depending on the specific mix design, curing conditions, and expected loads, but in general, it’s recommended to wait at least 7 days before allowing light passenger vehicles, and at least 28 days before allowing heavy trucks or equipment. However, it’s always best to consult with your concrete contractor or supplier for specific guidance based on your project requirements and site conditions.
What should I do to protect my concrete driveway from weather damage during curing?
To protect your concrete driveway from weather damage during the curing process, you can use various methods and materials, such as:
- Covering the surface with plastic sheeting, insulating blankets, or straw to prevent rapid moisture loss or temperature changes
- Using a curing compound or sealer to form a protective barrier against wind, sun, and rain
- Providing proper drainage and slope to prevent water from pooling or standing on the surface
- Avoiding the use of deicing salts or chemicals that can cause scaling, spalling, or corrosion
- Monitoring the surface regularly for any signs of weather-related damage or wear, and repairing them promptly
How often should I seal my concrete driveway after curing?
The frequency of sealing your concrete driveway after curing can vary depending on the specific sealer product, traffic conditions, and exposure environment, but in general, it’s recommended to apply a high-quality sealer every 1 to 3 years to maintain the protection, appearance, and durability of the surface. However, it’s always best to consult with the sealer manufacturer or a professional contractor for specific guidance based on your project requirements and site conditions.
What are some common problems that can occur during the curing process?
Some common problems that can occur during the curing process of a concrete driveway include:
- Plastic shrinkage cracking: This occurs when the surface of the concrete loses moisture too quickly, causing it to shrink and crack before it has gained sufficient strength. This can be prevented by proper moisture retention and surface protection during the early stages of curing.
- Thermal cracking: This occurs when the internal temperature of the concrete rises or falls too rapidly, causing it to expand or contract and crack. This can be prevented by proper temperature control and insulation during the curing process, especially in hot or cold weather conditions.
- Scaling and spalling: This occurs when the surface of the concrete flakes, peels, or pops off due to freeze-thaw cycles, deicing salts, or other physical or chemical damage. This can be prevented by proper air entrainment, surface finishing, and sealing of the concrete, as well as avoiding exposure to harsh or corrosive substances.
- Discoloration and staining: This occurs when the surface of the concrete changes color or texture due to improper curing, finishing, or exposure to contaminants or reactive materials. This can be prevented by proper mix design, placement, and protection of the concrete, as well as prompt cleaning and sealing of any spills or stains.
If you notice any of these or other problems during the curing process or afterwards, it’s important to consult with your concrete contractor or a professional engineer to diagnose the cause and recommend the appropriate corrective actions to prevent further damage or deterioration.
Conclusion
In conclusion, the curing process is a critical and complex aspect of installing a new concrete driveway, and one that requires careful planning, monitoring, and maintenance to ensure the best possible results and performance. From the initial set and early strength development stages to the full maturity and service life of the driveway, the curing timeline and methods can have a significant impact on the quality, durability, and appearance of the finished surface.
By understanding the basic concepts and factors of concrete curing, such as hydration, moisture retention, temperature control, and strength development, as well as the different curing methods and materials available, such as water curing, membrane curing, chemical curing, and natural curing, you can make informed decisions and take appropriate actions to optimize the curing process and achieve the desired properties and performance of your driveway.
However, it’s important to remember that the curing process is not a one-time event, but a continuous and ongoing responsibility that requires regular monitoring, testing, and maintenance to ensure the long-term health and safety of your driveway. By following proper usage guidelines, such as foot traffic timing, vehicle access, heavy load restrictions, and weather protection, as well as conducting routine visual inspections, moisture and temperature measurements, surface protection, and strength tests, you can detect and address any potential issues or defects before they become more serious or costly to repair.
At Pro Concreters Mackay, we understand the importance and complexity of the curing process for concrete driveways, and we have the expertise, experience, and equipment to ensure the highest quality and performance of your project from start to finish. Our team of certified and skilled professionals can help you design, install, and maintain a durable, functional, and attractive driveway that meets your specific needs, budget, and style, and provides reliable and safe service for your parking and access needs for many years to come.
Whether you need a new driveway for your home, business, or community, or you want to repair, resurface, or upgrade an existing one, we have the knowledge, resources, and dedication to deliver exceptional results and customer satisfaction. We use only the best materials, methods, and technologies available, and we follow strict quality control and safety standards to ensure the integrity and compliance of our work.
So if you’re looking for a trusted and reputable concrete driveway contractor in the Mackay region, look no further than Pro Concreters Mackay. Contact us today for a free consultation and estimate, and let us show you how we can help you achieve your concrete driveway goals and dreams with professionalism, reliability, and innovation.
For more information about concrete driveway installation, as well as our other concreting services, please visit our website or call us today. We look forward to serving you and exceeding your expectations with our quality, value, and customer service.
Concrete Footings and Foundations
Concrete Pathway and Footpath Installation
Concrete Pool Surrounds Installation